Tent Stitch Methods
Tent stitching is a good way to speed up your stitching
Contents
Introduction
What is Tent Stitching? Basically it is half of a full cross-stitch. There are a number of ways to do this and while all of them look the same on the front of your design they are worked differently on the back and provide differing degrees of coverage. There are also some pros and cons to the various methods
Overall using tent stitch rather than full-cross is much quicker as you are only forming half of a cross although you don’t necessarily save much floss as you usually need to use extra strands of thread to ensure that you still get the appropriate coverage to avoid having fabric showing through.
Three Methods for Tent Stitching
The diagrams below show how each of the three methods are stitched - viewed from the front, along with some stitched examples to show the rear.
Half-Cross Stitch
Stitching from left to right
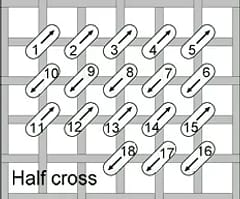
By Original uploader was Velvet-Glove - Author, Public Domain, Link
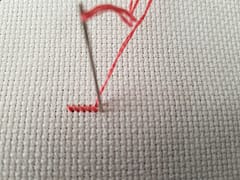
Half-cross stitch is the easiest method to do as it is just one arm of your regular cross-stitch - it doesn’t matter which orientation the diagonal goes as long as you keep this consistent across the whole project. Half cross stitch is worked horizontally across or vertically down the fabric. On the back, the stitch appears vertical or horizontal depending on the direction of your stitching, not diagonally as it also only crosses one thread of your fabric. This method will use less floss as you stitch but over large solid areas will provide less coverage on the backside and so your stitching may appear thinner on the front, obviously the thing to concentrate on is whether you are happy with the coverage on the front - this is more of an issue on the lower fabric counts as there could be more show through between holes with a thinner back. This method is best suited to stitching in confetti heavy designs.
When using the basic half-cross stitch it is especially important to try to keep your tension even. If tension is too tight the fabric may warp causing the design to look like it is leaning to one side as all the threads are pulling in one direction so be careful not to pull stitches too tight as you work and be very aware of this if you are stitching over a large solid area. Working on a frame can help with avoiding this. It can also be harder to run your needle under the stitches on the back to tie off your thread when using this method.
Stitched half-cross stitch
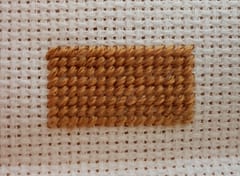
Rear-view of half-cross stitch

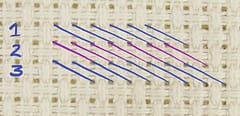
Continental Stitch
Stitching right to left along the first row, left to right on the second.
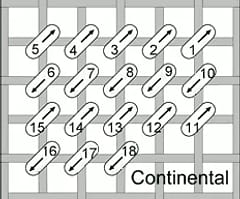
By Stefkar modified from a work by Velvet-Glove - https://commons.wikimedia.org/wiki/File:Continentalstitch.png, CC BY-SA 2.5, Link
Continental stitch is worked horizontally or vertically across the fabric. On the back the stitches are longer and slanted diagonally across two squares of the fabric. This method uses more floss than half cross stitch as you are carrying over two squares on the back, it is bulkier and thicker on the back so provides a more solid area of stitching so helps with coverage on the front. It is not ideal for confetti heavy designs though. As you are alternating direction between rows on the back of the fabric the tension is more evenly distributed so this method is better for stitching large solid areas of one color as you are less likely to experience the warping that can occur with the half-stitch method although you still need to be aware of your tension.
One thing to be aware of when stitching continental is how you continue stitching when switching rows - if you stitch the second row in the same way as the first you will actually end up with a row of continental followed by a row of half stitch, for example from the above diagram if you stitched stitch 6 from bottom left to top right as you were doing for the first row of stitches - this can cause the front of the stitching to look a bit uneven.
Continental stitch front view
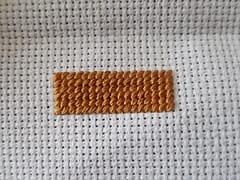
Continental stitch rear-view
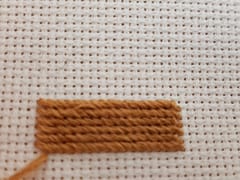
Diagram of 3 rows of rear-view of continental stitch
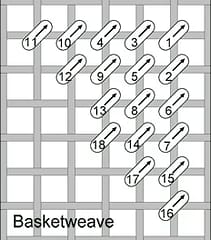
Basket Weave Stitch
By Velvet-Glove at English Wikipedia - Transferred from en.wikipedia to Commons., CC BY-SA 3.0, Link
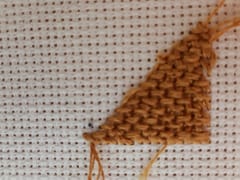
Basketweave stitch is worked in diagonal rows of the fabric. The floss on the back of the canvas has a “basketweave” appearance, with alternating horizontal and vertical stitches. Basketweave is the best stitch to cover large areas of canvas as it distorts the canvas the least and provides a good solid back to your work along with good coverage. It is a bit trickier to stitch as you need to be much more aware of the pattern of your stitching on the back and to be consistent
Basket Weave Stitch
Basket Weave Stitch Rear-view
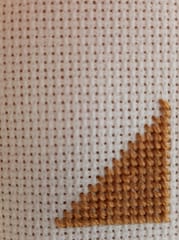
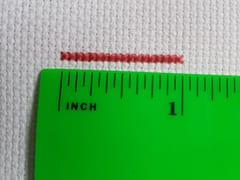
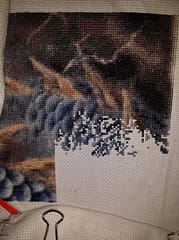
Here is an example of a design stitched with Tent stitch rather than full cross - this is a dapper little fella is a photo to chart conversion by Thread-Bare and is being stitched on 25 Count fabric with 2 strands of floss
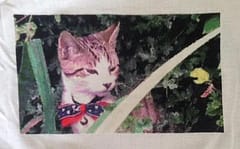
Picture credit Jackie Thomas
This picture is an excellent example of how you can still have great coverage with 2 strands of floss.
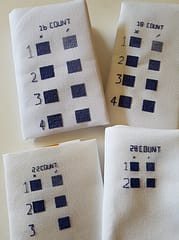
Check out our previous article which showed examples of coverage over various thread counts using cross-stitch and tent stitch. Coverage article
Hopefully this has been useful in explaining the basics of the tent stitching, it’s definitely worth giving it a try to help speed up your stitching!
Be sure to like and follow us on our Thread-Bare Stitching Facebook Page or Thread-Bare Stitching Pinterest Channel for news and announcements.
