Cross-Stitching to Diamond Painting
Two crafts with lots of overlap
Contents
Introduction
We all love our cross-stitching but it can represent a serious investment of time, effort and materials - although the results are often amazing and well worth it.
Diamond Painting is a newer craft that has a lot of similarities to cross-stitching and can even use the same patterns but produces results a lot faster.
We’ll try to show you the similarities and differences between the two and how to get started with the hobby.
What is it
Diamond painting is the process of developing a mosaic to re-create an image using tiny faceted “diamonds”, also known as drills by attaching them to a sticky canvas. As with cross-stitch one pixel of the image equates to one stitch or in this case one drill.
You will often see DP kits described as 3D or 5D painting, a lot of people say they can’t really tell the difference and the terms now seem to be used interchangeably to describe the craft more to give the impression of dimension. There are subtle differences though as this describes the number of facets on the drills and so the 5D newer drills give a higher sheen finish.
Canvas
Just like with cross-stitching where you can use a fabric with the pattern pre-printed onto it or a blank fabric and ‘count’ the relative positions to place the stitches, so too with Diamond Painting you can work with a pre-printed canvas or a blank one.
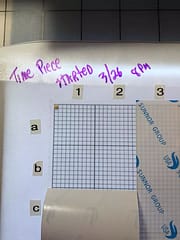
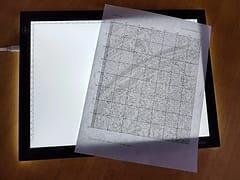
Pre-printed is obviously easier as you just have to position the tiles onto the right symbols but blank canvases are pre-divided into 10x10 grids which make using a pattern relatively straightforward. There are also tricks you can use such as putting the pattern over a light-pad to display the printed pattern through the blank canvas.
Whatever you are using each canvas comes with a protective paper to cover the sticky surface underneath. So peel back a portion of the covering page to expose the sticky surface to place your drills. It’s important not to peel back too much at once - you don’t want to risk exposing a large area until you are ready to work on it in case you accidentally stick a piece of paper to it for instance.
Pre-printed Canvas
Blank Canvas
Measurements
Unlike cross-stitch where you have multiple choices of fabric size such as 14, 16 18 count aida etc which are always measured in inches (the number of squares per inch), Diamond Painting uses a fixed resolution canvas which is 2.5 drills per centimetre - equivalent to 10 count aida which means 10 drills per inch.
So right away there is a difference - a Diamond Painting is never going to be as high a resolution as a cross-stitch piece can be. It also means the completed piece has to be larger (physically) if it’s to capture the same level of detail.
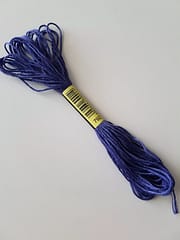
Drills
Diamond painting drills use the same color and numbering convention as DMC floss but often only the traditional 447 color range (the same as the low cost CXC alternative for threads). This means that any pattern using the newer 01-35 DMC colors (released late 2017) may not be suitable for diamond painting although some suppliers are beginning to make tiles available in those colors.
The drills come in either round or square shape. Square drills are easier to align and should ‘snap’ into place and they also give a better solid coverage finish so would be the drill of choice if you are using a blank canvas using a chart rather than pre-printed charts as there are no gaps between drills with square ones. Some pre-printed charts have the image printed on so that they fill in the gaps between the round drills but round drills don’t line up well without a lot of work.

Comparison Cross-stitch to Diamond Painting
Here are some images comparing cross stitching to diamond painting, both of these were charted with the thread-bare app.
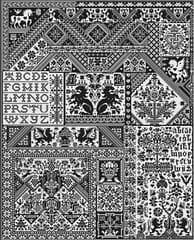
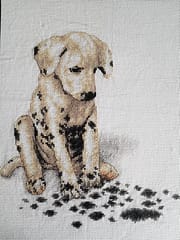
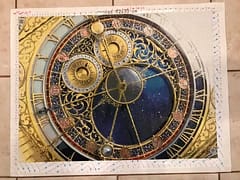
Thread-bare Timepiece - stitched by Nancy Ihasz
This is a higher resolution version of the image so produces a finer detail than diamond painting can for the equivalent size.
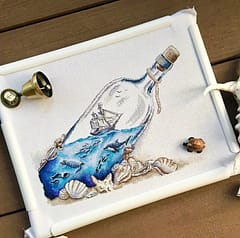
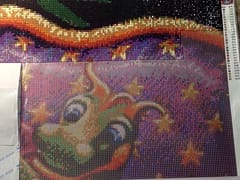
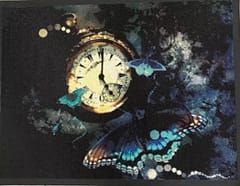
Thread-bare Timepiece - diamond painting by Toby Murphy
Although a lower resolution the tiles give a more ‘solid’ looking and brighter appearance.
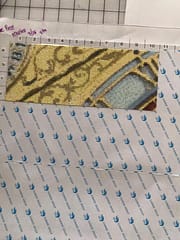
Timepiece charted by Thread-Bare - completed by Toby Murphy
This chart is a available for purchase through the thread-bare store
From the images above you can see that the diamond painting has a higher sheen due to the faceted drills and the colors seem very vivid and the coverage is denser than stitching which has a more delicate finish.
Note: the diamond painting version was converted specifically for use with diamond painting and the colors made more saturated to give a more colorful result.
Size Matters
Due to the fixed tiles-per-cm size of the canvas choosing the size of your image is especially important as a lot of large full coverage cross-stitch charts would end up being huge when done as a diamond painting. Remember, you don’t have the option of adjusting the piece size by changing the fabric count as you do with cross-stitching.
We see the same issues that exist in cross-stitching but even more prevalent - people purchase a conversion of an image into diamond painting without seeing a true mockup of how the final piece will really look.
It’s important to know that the piece you buy will produce the image advertised so don’t just go off how the original image looks, you need to see what it looks like when it’s reduced to the size and color count of the pattern.
Converting Images
You can convert your own image using cross-stitching software but as noted earlier it’s important to make sure that you limit the pattern to the traditional 447 DMC colors unless your tile supplier has the newer 01-35 colors available. It also helps if the software shows the size of the pattern in cm but if not, divide the size in ‘stitches’ by 4 to do the conversion. i.e. if the pattern is 300 stitches wide, it will be 300 / 4 = 75cm wide.
Our thread-bare app will show you the size in cm as well as the different fabric sizes for stitching so you can make sure that the pattern you produce is one you can get canvas for.
We have also added the option to download a special chart optimized for diamond-painting which will print the pattern at exactly 1:1 size so that you can put it between the canvas and a light-box and see the symbols projected through - giving the flexibility of custom charting with the ease of use of a pre-printed-like canvas.
Work Area / Mobility
The other big difference with stitching is where you can work. Who doesn’t love snuggling into a comfy sofa to stitch while your favourite TV show is on? With diamond painting you really need a solid flat surface to work on and the bigger the piece the more space you’re likely going to need.
This means that diamond painting is less transportable so you’re not going to be able to take your WIP on a journey (no DP on a long plane ride!)
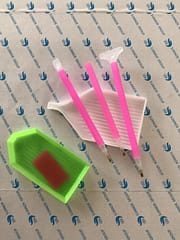
As well as a flat space, you will also find a light-pad helps make things clearer and you will need a small tray and tool to place the drills - typically a pen with a wax tip to pick them up from the tray and place them onto the canvas.
Lightpad
One tip while working is to start at the top of the piece - that way the completed area scrolls off the top of the table as you progress rather than coming forward into your lap.
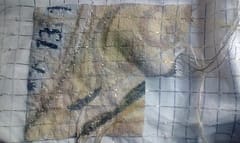
Here are some more work in progress and finished photos:

Special thanks to Toby Murphy & Nancy Ihasz for photos and help putting the information together to write this post.
We’ve started a new facebook group specifically for diamond painting for anyone looking for inspiration, help getting started and information on how to order your supplies as well as other helpful tips. Check it out at Diamond Painting Unlimited and join us today!