Cross Stitching - Supplies
Fabric, Threads and Equipment
Contents
Introduction
Let’s review the basic supplies needed to begin cross stitching …
When starting out with cross stitching I would recommend purchasing a simple kit, kits usually contain everything you need to get you started (fabric, floss, chart & needle) so you are able to learn the basics without worrying about your supplies. Most needlework or hobby stores usually carry a range of kits. The following article explains the supplies needed once you are ready to start purchasing stand alone charts and kitting up the project yourself:
Choosing Your Fabric
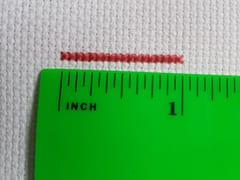
Fabrics used for cross stitching are aida, linen or evenweave (which is a mixed content fabric). Cross stitch fabric is woven to ensure that there are the same amount of threads within an inch of fabric.
When shopping for cross stitching fabric or kits you will always see a thread count mentioned. This thread count tells you how many stitches there are per inch - so when using 18 count you can expect to fit 18 X’s across an inch of the fabric. Cross stitching fabric is available in sizes 11 - 40 count. Aida fabric goes up to 20 count, 22 count is hardanger and 25 count and higher is evenweave or linen.
18 count fabric - meaning there is 18 squares across 1 inch
When calculating the size of fabric you need for a given project you need to decide which count of fabric you want to work on - I would suggest you find a count that works well for you as you are going to be looking at it for a while as you complete your picture ! The higher counts can be a strain on your eyes and it is harder to count completed stitches, so if you’re just starting out I would recommend going with something between 14 - 18 count and then as you get more practiced you can give the higher counts a try.
To calculate the size of fabric you need to complete your project you need to know the number of stitches across the width and height of the design and also decide what thread count you wish to work on. You then need to divide the number of stitches in the width by the thread count, this will tell you how many inches the width of actual design will be. IMPORTANT you then need to add 6 inches to this number so that you have 3 inches of blank fabric at the edges of your picture to allow for framing. Then you would calculate the height in the same way.
For example if my design had a width of 450 stitches and height of 648 stitches and I was planning to use 18 count fabric my calculation would be as follows:
- Width 450 stitches / 18 count = 25 inches + 6 inches = 31 inches
- Height 648 stitches / 18 count = 36 inches + 6 inches = 42 inches
So I would purchase 18 count fabric measuring at least 31 x 42 inches, this would allow me to complete my design with 3 inches of blank fabric all around the edge for framing.
The lower the thread count the larger your finished design will be and you will also use more floss as the individual stitches end up larger.
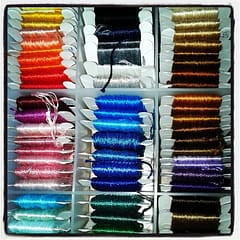
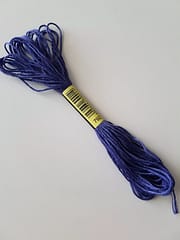
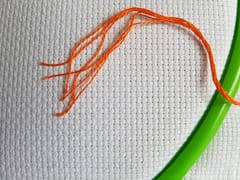
Floss
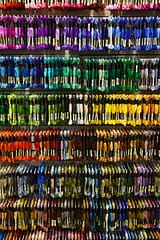
Six stranded cotton embroidery thread is the most common thread used for cross stitching, the most popular brands are DMC and Anchor, and if you buy a kit most likely it will contain one of these brands. Floss is sold as one continuous thread, that comes in a skein. Top tip! - when taking thread from the skein always pull from the end that has the large label on, if you pull from the end with the short label it will bunch up and knot.
Skiens of floss
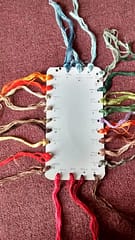
Each thread is made up of six individual strands that are loosely wound together and are easily separated. When stitching you will most often use 2 strands at a time so you need cut off a section of thread and then separate off 2 strands from your piece as you need it.
6 stranded embroidery thread
The number of strands used will affect your coverage of the fabric. If you don’t use enough some of the white of the fabric can show through especially if you are stitching with darker coloured thread on light coloured fabric. Some of the higher counts fabric will only require 1 stand to get good coverage and it will depend on whether you are stitching in full cross vs tenting (half cross stitch). Another consideration when using the higher count of fabric is that the fabric can become bulky and distorted if too many strands are used, especially when working on a full coverage design and you may find you have trouble pushing the needle through from the back.
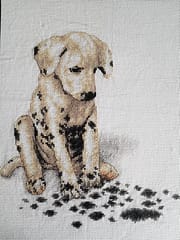
There are no exact rules to this, there is a balance to be found between the coverage and ease of stitching also a lot of this is down to personal preference so when moving to a new fabric count do a few test stitches to gauge the coverage. I’ve posted some example of coverage across various thread counts for comparison.
When kitting up your own project try to buy all the floss of a particular colour at the same time where possible, the reason for this is during production, thread is coloured in dye lots which occasionally can lead to slight colour variances between lots. This will not really matter for small detailed areas but if part of your design has large blocks of the same colour it could be noticeable.
Below is a very approximate estimate of number of stitches you can produce from one 8 yard skein on different counts of fabric
Full Cross Stitching 2 strands over 1 stitch
- 16 Count - 1800 Stitches
- 18 Count - 2000 stitches
- 20 Count - 2200 stitches
- 22 Count - 2400 stitches
- 25 Count - 2600 stitches
- 28 Count - 2800 Stitches
NOTE: This is a very unscientific guide and a lot will depend on your personal stitching style, how much waste you produce starting and finishing and how complex your pattern is. If your design is very detailed and confetti heavy there will be more starting and ending of colours producing more waste whereas stitching in blocks of colour makes your thread go further.
Securing Your Fabric
There are a number of ways to secure and hold your fabric while working on it, you can just hold it and work in hand or you can use something to increase the tension of the fabric such as a hoop, snap frame or scroll frame. These devices will also prevent distortion and help to keep your stitches looking consistent.
Hoop - Two rings which fit together, place the fabric between the rings and tighten the screw until the fabric is taut. Hoops can also be used to frame smaller designs, an upcoming post will give instructions on this.
Hoop
Hoop
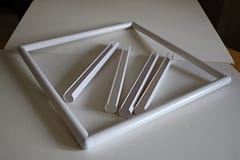
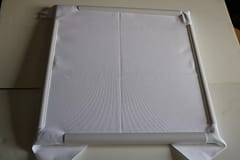
Snap Frame
Snap Frames - Plastic tubes available in various lengths along with corner pieces which fit together to form a square or rectangle, the fabric is then laid over the square and securing clamps are then pushed down over tubes trapping the fabric between. Once the clamps are in place you can roll them towards the back which will increase the tension of the fabric for stitching. To remove the clamps just slide them up or down off the tube to release the fabric.
Placing a piece of scrap material between your stitching fabric and the clamp is a good way to give some added protection and stop any existing stitches from being flattened too much.
Do not use snap frames or hoops on an area of stitching the you have added beads to as they will be crushed.
Hoops and snap frames will leave creases in your fabric, these are easily removed after washing and ironing your finished piece. You can also limit these by removing the hoop or snap frame if you are not planning on working on the project for an extended period of time.
17” x 17” snap-frame
Snap Frame with Fabric
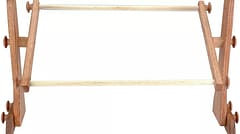
Scroll Frame
Scroll Frames - As the name suggests scroll frames hold your fabric rolled up like old fashioned scrolls of parchment. The fabric is attached to scroll bars held together by two end bars/spreaders. Scroll frames secure the entire piece of fabric rather than just a section unlike hoops and snap frames do. Scroll frames can be attached to a lap or floor stand also.
Needles
Cross stitching is usually done with a blunt embroidery / tapestry needle, the size to use will depend of the size of fabric you’re using. A size 22 or 24 needle will usually work well with 18 count aida fabric

Never miss an article. Like and follow us on Facebook ThreadBareStitching and Pinterest