Tips for Tackling Large Scale Projects - Part 2
Preparing to make that first stitch
Contents
- Introduction
- Get Organised
- Serging or Hemming Edges
- Get Comfortable
- Gridding
- Starting at the Edge or the Middle
- Washing
Introduction
In our Tips for Tackling Large Scale Projects - Part 1 article we discussed setting the correct expectations for beginning a large project along with purchasing your supplies. Here we will look at how to prepare your supplies and getting organised along with planning where to begin stitching.
Get Organised
As tempting as it is to dive into a new project and get stitching, I find it much easier if I’m organised. If I start without fully getting my floss and fabric sorted I tend to get frustrated. Here are some options for floss storage
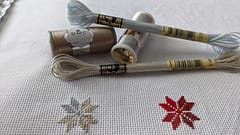
Thread Cards
There are a number of ways to organize your floss. If you have only stitched kits before you will likely be most familiar using floss cards as this is how most kits are packaged. But when dealing with 80 + colors these may not work so well, I also find that they tangle up easily and the cards become worn and ripped pretty quickly and especially over time. They work well for some people but they are just not for me on a larger project
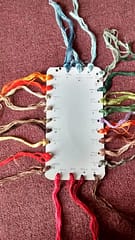
Bobbins
I keep a separate bobbin storage box for each of my projects. All the floss has their own bobbin which has the symbol on one side and the skein number on the other with spare skeins kept in ziplock bags. Although using bobbins is more time consuming up front as you have to wind and label them all I find they save a lot of time in the long run as I do not have to constantly refer to the symbol legend to see what number relates to which symbol - I only have to do this once as I get setup and then I can focus completely on the stitching.
Bobbins Plastic (top), cardboard (bottom)
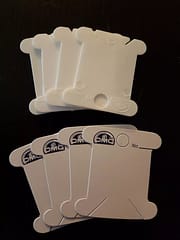
A good way to save some time putting your floss on bobbins is to use and electric drill to wind them, it takes a bit of getting used to but once you have it, it is so much faster to wind your bobbins.
Plastic Storage Box
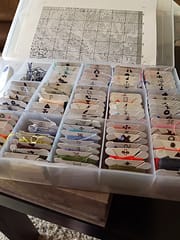
Decorative box with home-made dividers
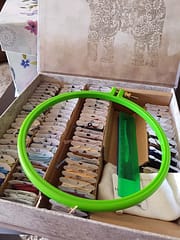
Another way some people use bobbins is to have a master set of floss that they use to stitch all their projects from but if you do this you cannot label the bobbins with symbols as they will differ for each project so you will have to always refer to the chart legend which just adds friction and increases the likelihood of making a mistake.
Floss Bags
Another way to organize your floss is with floss bags. Each color has its own bag and they can be held together on a ring or in a shoe-box
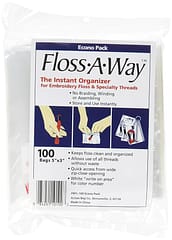
Floss A Way Storage Bags available in crafts stores or online
TIP: If you are not able to buy these from a store, regular zip-lock sandwich bags work just as well !

Serging or Hemming Edges
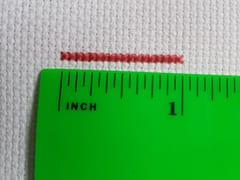
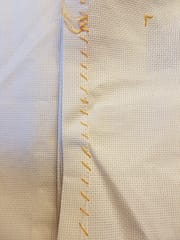
As you will be working on the project over a long time the fabric will be handled a lot and this can eventually lead to fraying of the edges which you will want to control to avoid losing too much fabric. Often needlework stores will serge the edges for you but if they do not offer the service you can add a temporary hem to help protect the fabric. Just fold the fabric over and iron it, then add a simple running stitch to hold the hem in place - this can then be undone once the project is finished so don’t worry about making it super-neat.
Hemming Fabric - mine isn’t pretty but it works
Get Comfortable
Being comfortable while stitching is important otherwise you will lose interest or even injure yourself. This is especially important with larger projects as the weight of the extra fabric can put a strain on your neck and shoulders so get your setup right by using a scroll frame or hoop stand to help support the weight of the excess fabric. Learn about possible health issues while stitching and how to avoid them
Gridding
Gridding can help you to avoid making counting errors. Sometimes counting errors can be glossed over but other times they can severely impact the design, sometimes enough that you will have rip out stitches. Gridding can also be very helpful if you are planning on stitching with the extreme cross-country method, working one color at a time across the whole design.
There are a number of ways to grid:
- Water soluble fabric marker - do a test patch to ensure the pen you have will wash out when finished.
- Mechanical pencil
- Fishing line
- Contrasting colored floss
- Pre-gridded fabrics
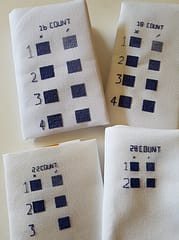
To grid you mark an area that matches the 10 x 10 grid as it appears on the pattern. Some people do this over entire piece of fabric before starting which is pretty time consuming but you can also just grid a smaller area such as a page at a time. Here are a few samples of gridding using regular floss.
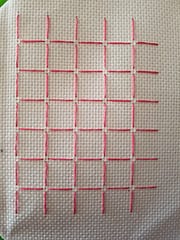
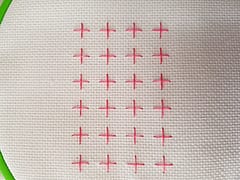
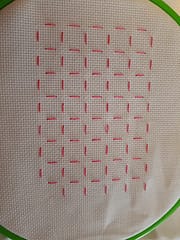
Gridding can easily be removed after the area has been stitched by snipping the thread and carefully pulling it through.
Pre-gridded Fabric
You can buy pre-gridded fabric with these lines on already which you then wash at the end and the lines come out. This is a huge time-saver if you definitely want to grid out your fabric
25 Count Magic-guide Fabric
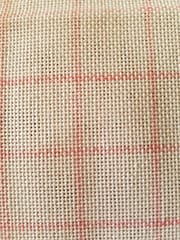
Magic Guide fabric is marked in 10 x 10 squares for 14 to 18 count fabric and 20 x 20 squares for 25 count and above it is produced by DMC and is 100% cotton. Easy Count fabric is marked in a 10 x 10 grid for all fabric counts it is produced by Zweigart and is a blended fabric.
Starting at the Edge or the Middle
Some chart designers suggest starting at the left hand corner of the design but this may seem odd if you have previously only worked on smaller kits as most of them suggest starting in the middle, on the other hand trying to find the middle of a chart spread across multiple pages can also seem confusing at first. There are benefits to both
Starting at the Edge
One benefit of starting in the top left of the fabric is that you can just start stitching from page 1 of your chart but you need to find the correct place on the fabric to start. Decide how much allowance you want to use for a border for framing I normally allow three inches as we described in the fabric calculation in Part 1. Measure down from the top and over from the left side. The intersection of those two points is your starting point. Some people then grid out the whole stitching area which will help you to be sure your design will be centered on the fabric, but if you are confident in your fabric size and calculation this isn’t necessary.
Starting in the Middle
I find starting in the middle more interesting as you are usually jumping right into the interesting main feature of the chart and not beginning on the more boring background area. On the other hand the pattern in the center is likely to be more complex and confetti heavy. To do this you need to find the center of the chart as well as the fabric.
The stitch count on the chart below is 380w x 253h, you find the center points divide these two numbers in half which means the center point is at the intersection of 190w x 126h.
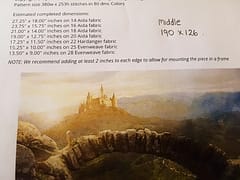
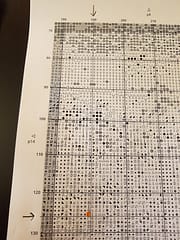
Find the page of the chart that has these two coordinates on, the point where they intersect is the middle starting point (highlighted below). Some patterns only mark these on the very edge pages of the chart which is less than useful - we’ve made sure that the center lines are drawn on all pages of our charts in red and blue so that finding the middle is easier (and the index page showing where each page is helps too).
Washing
Working on a large project is going to involve handling the fabric over many hours so it is inevitable that it will need washing by the end no matter how careful you are - the natural oils in your skin will transfer onto the fabric, it is important to remove these in order to preserve the piece over time even if it doesn’t look particularly dirty. Also if you use a hoop or snap frame you will have some pretty obvious creases. The thought of washing a project that you have invested some much time and effort into can seem really scary but it really isn’t that bad. Here is our previous article about washing finished projects:
Washing & Ironing Your Finished Cross Stitch Project
Hopefully you find these articles useful and they will help you take the step to begin a large project - it’s really not as hard or as intimidating as it first seems so go for it !
Follow our us on our Thread-Bare Stitching Facebook Page or Thread-Bare Stitching Pinterest Channel for news and future articles.
