How to Cross Stitch onto a Garment
Using Waste-Canvas
Contents
Introduction
Adding a cross stitch motif is a fun way to personalize a garment, and is especially fun if you have kids and would like to add a cute character to an otherwise boring plain t-shirt. In order to cross stitch onto a piece of regular fabric you would use a piece of “waste canvas”.
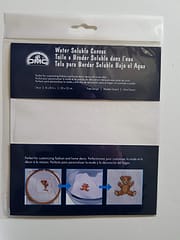
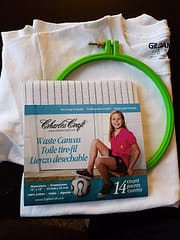
Waste canvas is an aida type of fabric made from woven threads which are heavily starched to hold them in place, you attach the waste canvas over the fabric of the garment to use as a guide so that your stitching is even and consistent.
Here I’m going to stitch a small design onto a child’s t-shirt using 14 count waste canvas. The design is a pattern from “World of Cross Stitching” magazine, issue 258.
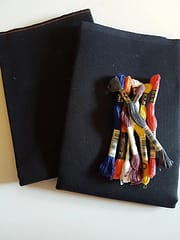
Supplies needed:
- Plain t-shirt
- 14 Count Waste Canvas
- Hoop
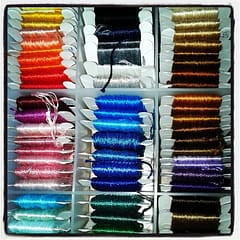
- Floss
- Design of your choice
- Tweezers
Step 1
Measure the size of your design and cut a piece of waste canvas that is slightly larger than the design you are going to stitch. I allowed about an inch around the design.
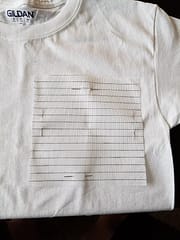
Step 2
Decide on the positioning of the design on the t-shirt and lay the waste canvas over the t-shirt and pin it in place (I realized I didn’t have pins so used cross-stitch needles!)
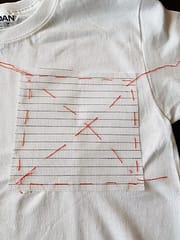
Step 3
Tack the waste canvas to the t-shirt diagonally making sure the fabric underneath the waste canvas is flat and does not pucker, then add a line of tacking around the edge of the waste canvas to help hold it in place.
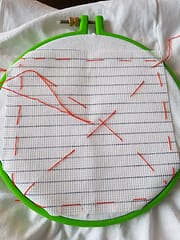
Step 4
Attach your hoop to the t-shirt, ideally position the hoop so that you will not have to move it until the whole design is stitched
Inside of t-shirt with hoop attached - make sure fabric is flat and unpuckered

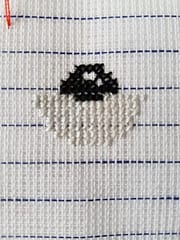
Step 5
Begin stitching from the center of your design, Stitching from the center will help to avoid puckering of the t-shirt fabric. Keep checking on this as you stitch. Stitch using the holes in the waste canvas in the same way you would use regular aida. Be precise with your stitches making sure the stitches meet without leaving holes between them. Make sure the needle goes through vertically and not slanted at all so the holes are lining up with the fabric you’re stitching onto and the arms of the stitches meet (they normally go through the same hole - you don’t want any gap).
Step 6
Once you have finished stitching your design, remove the hoop and tacking stitches. I then trimmed down some of the excess waste canvas around the stitched area

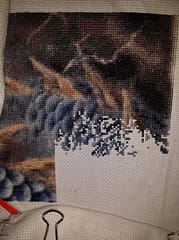
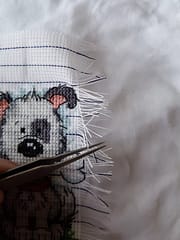
Step 7
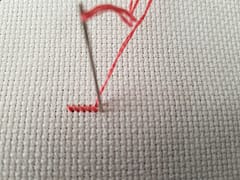
Now wet the waste canvas. Wetting the canvas removes the starch which will soften it and help with removing the threads of the canvas. With tweezers start carefully pulling around at the individual threads of the canvas to remove them one at a time. Pull firmly from one end but do not tug, I found pressing down on the stitching as I did this to hold it flat helped. Remove all the strands one by one from the direction that the blue line is running first - for me this was horizontally
Step 8
Once I had removed all the strands that ran horizontally the vertical ones pulled free very easily. Always pull one by one and don’t be tempted to try and do a couple at a time.
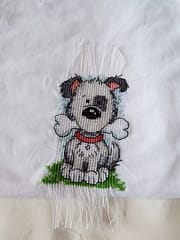
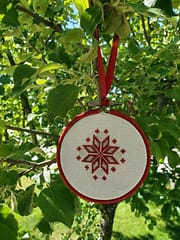
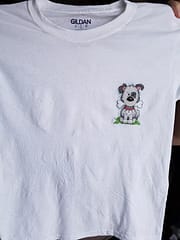
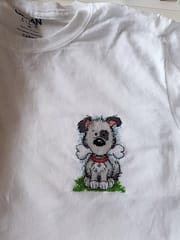
And that’s it ! The cross-stitch is now as if you’d done it directly onto the material - you did, you just used the waste canvas as a temporary guide for the stitches. You now have a cute personalized t-shirt but could just as easily customize any piece of material for whatever you need.
One thing to note, I used a regular cross stitching needle to do this but if you are planning to stitch onto a heavier or thicker fabric than a t-shirt for example denim you may need to use a sharper needle.
I hope you found this interesting and informative. As always, please like and follow us on our Thread-Bare Stitching Facebook Page or Thread-Bare Stitching Pinterest Channel for news and notification of future articles. Also checkout our Thread-Bare Flosstube Channel