How to frame your own Cross-Stitch using the Lacing Method
Framing your finished piece doesn't need to be expensive
Contents
Introduction
Professional framing can be very expensive, especially for a larger piece. You can easily expect to pay a couple-of-hundred dollars or more even for just a mid size piece.
So having a finished piece professionally framed may not be possible if you are on a budget. But when you’ve spent all that time stitching you don’t want to to just stick it in a drawer because you cannot afford to frame it - so why not frame it yourself?!
The thought of framing yourself can be intimidating but it’s not that hard and like anything gets easier with practise, as with stitching itself it’s a case of starting with something small and working up.
It is best not to use glue to secure your fabric as it can degrade and spoil or dis-color the fabric over time so lacing is a much longer lasting finish and it can always be undone if you’re not happy with the results or you decide you want to change the frame. Gluing is rather permanent.
[
Supplies
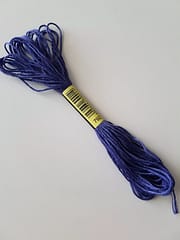
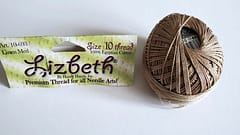
- Heavy duty thread - $6.60 Lizbeth tatting thread Size 10, 100% Egyptian Cotton
- Sturdy Cardboard backing - very heavy duty large sheets available from Michaels for about $6.00
- Picture frame - off the shelf from Michaels $13.99
- Clips / pins / pegs - something to hold fabric in place, while lacing - I used wonder clips I had for quilting
I didn’t include the cost of the clips as I already had them and you can use whatever you have on hand as long as it holds the fabric without damaging it.
Total cost about $27
Prepare you materials
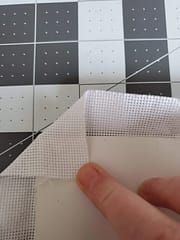
You want to pick a cardboard backing that doesn’t have much give in it as you will be pulling the fabric taut and you don’t want too much bend in the cardboard.
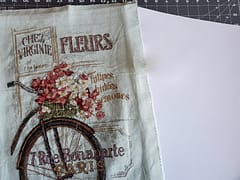
Cut your cardboard to the size that fits your purchased frame. Hold your fabric around the cardboard and test the fit in the frame, the fabric will add a little bulk so you need to ensure the frame will accommodate it otherwise you may need to shave a little of the cardboard off - but not too much as you want the fit to be nice and snug. Always remember to test the fit prior to assembling - you don’t want to lace the whole thing up and then realize it won’t fit the frame because of the fabric!
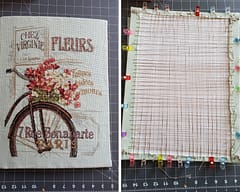
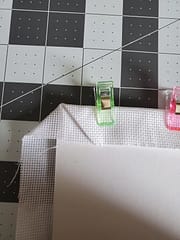
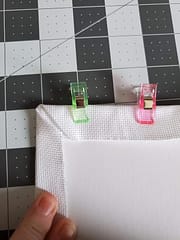
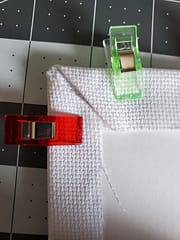
Fold the fabric around the cardboard and clip to hold everything in place. It is best to have about an inch of overlap on all sides. I ended up with less than this along two edges as this piece as it was a kit and they tend to be a bit stingy with fabric allowance.
Fold the corners flat and secure with clips
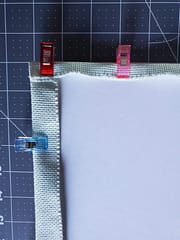
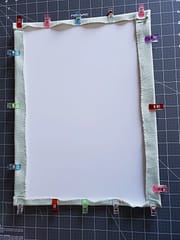
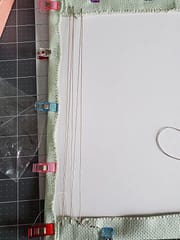
Flip your project over a few times and ensure that the design is centred as you clip the fabric all around the edges. Ensure it is completely secure and won’t move as you are lacing.
Lacing
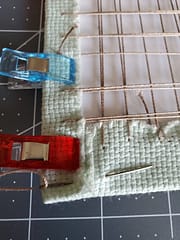
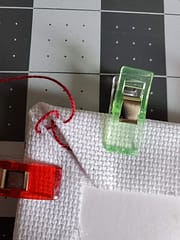
You’ll need a heavy duty strong thread to lace with. I used size 10 thread that is sold for tatting. You will need a lot of thread, I started with a full 122 yard ball of thread and probably ended up using a good 2/3 of the ball in lacing this piece.
To start lacing get a long piece of thread, I used around 4-5 feet lengths, knotted at the end. Come up from the back under the edge of the fabric so the knot is underneath, then work your way back and forth, lacing in alternate directions, keeping the tension tight as you go.
Start about 1 cm in from the edge of the fabric, you don’t want to be too close the edge as there is the danger of your fabric fraying.
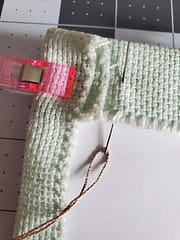
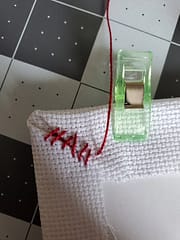
As I worked my way across I weighted the piece down to avoid bending.
As I ended each piece of thread I did a few overlapping backstitches along the fabric to secure it and keep it taut, I then knotted the thread.
I laced the length of the fabric in one direction and then the other
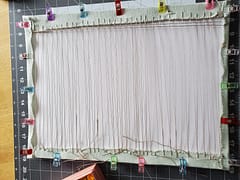
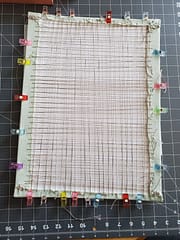
Try to keep your tension even throughout in both directions.
Corners
I had very little fabric allowance on two sides so I just turned the corners over. This method doesn’t give as tidier a finish and can be a bit bulky as you have four layers of fabric in once place but as long as your frame will accommodate the extra bulk though it will work.
Stitch the corners down using a long stitch making sure you pick up all layers of the fabric.
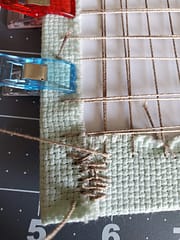
A tidier and slightly more advanced way to finish the corner would be to miter them.
Mitered corners are easier when you have an even amount of fabric overlap on both edges of the corner (which I didn’t have on my project)
Example of Mitered Corner
Here is an example of how to do a mitered corner
Place your backing board and fold the corner in against the cardboard
Fold one length of fabric and clip while holding the corner down underneath
Fold in the second edge and clip.
This will create a tidy 45° angle
You can then stitch an overlapping line along the join
Mitered corners reduce bulk and you end up with a tidy 45° angle that lies flatter.
Once you have secured all of the corners trim the thread ends and then remove the clips
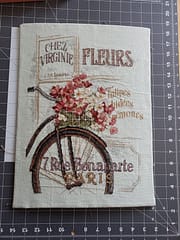
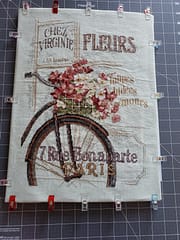
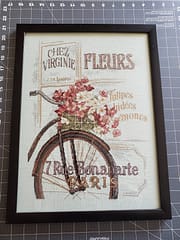
Place your completed piece in your frame and you are done !
Conclusion
If you are going to use a professional framing service I would strongly suggest going to a dedicated speciality framing store and ensure that they are familiar with handling needlework it may be expensive but for your big heirloom piece that you have spent years stitching it is definitely worth the investment. You may be surprised, it may even cost less than you expect, so it’s worth getting a quote to compare other prices against.
Big box craft stores also offer framing services but are often still expensive even with the frequent deals and coupons they often have and you are more likely to have someone who is not 100% familiar with handling stitching which could result in poor results and disappointment. Compared to a dedicated framing store, they may only have had a limited amount of training so there is some risk involved.
Whatever option you ultimately chose, take your time and don’t be afraid to compare different services until you find somewhere you are comfortable with and confident of, but don’t be scared to try framing yourself - it’s definitely not as intimidating in practice as it may initially appear.
Be sure to like and follow us on our Thread-Bare Stitching Facebook Page or check out our links page for a full list of all of our social media channels and services Thread-Bare Links