Tips for Successful Stitching While Travelling
Making best use of travel time to stitch
Contents
Introduction
For many of us, travelling can be the perfect excuse to spend some solid time on our stitching but it needs to be practical and doable. You also need to ensure you are not going to run into a problem with airport security if you are flying or have any other disasters such as losing equipment or materials or the entire project!
Keep it Simple
Switch to a smaller, simpler project - trying to work on your full coverage, 5 year, supersize bayern tapestry type project really isn’t practical, plus you are always going to be at risk of it getting damaged or even worse, completely lost, both of which would be devastating if you have been working on it for a long time.
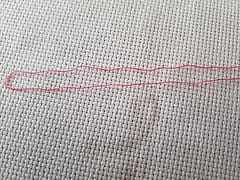
Save an area of your stitching that is simple such as a large block of color, and avoid large areas of complicated confetti so that you can still make progress but it reduces the amount of color changes needed. You want your stitching to distract you from the journey but don’t want to be so focused that you are not aware of your surroundings or inconvenienced severely if you are interrupted (like with meals on a flight)
Pre-plan your area of stitching, maybe work on creating a few areas that are outlined so you can just fill them in later, so you are not having to refer to the pattern so often or at all. Trying to be organized upfront will mean you need to have less things out and around you in order to work. The more things you have, the more chance for losing them! You also don’t want to be “that” passenger that unloads their entire home contents on and around them and is seen as a nuisance by other passengers. Who knows, you may introduce your fellow passengers to a new hobby.
Only take the few colors you need in your carry-on, you don’t need to have every skein of the entire spectrum of colors of your project immediately to hand. Plan the area of your project you are going to work on and just have the couple of the colors needed in a ziplock bag.
Keep your work area compact - you don’t need loads of needle minders hanging off your stitching or more than one needle threaded at any one time that can be dropped and lost. This could be annoying for fellow passengers if you are spilling over your area with your stitching and will add stress to your journey - so be ruthless in deciding what do you actually need to have immediately to hand.
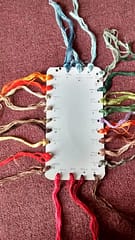
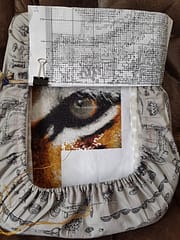
A grime-guard can be a great aid for keeping your stitching compact and neat and easier to handle. It can also provide a place to attach the pattern to with a hair-band or other elasticated strap. This is my stitching setup which is very compact using is a 8x11 q-snap:
What to Take
If you are flying you have a couple of other things to consider as well as keeping things simple and compact. There are many rules concerning what can and can’t be taken through security when flying.
The TSA website has a search feature to look up what you can bring on a flight TSA rules
I would suggest the main thing to remember is don’t take along anything you care about losing or leaving behind. As much as you can research the TSA/airport rules you are always at the mercy of any individual officer being particularly over-enthusiastic and strict in enforcing the rules and arguing your rights isn’t often going to work. So don’t carry-on your antique sewing scissors or other expensive tool that you would not want to lose or can’t replace.
The website does state “The final decision rests with the TSA officer on whether an item is allowed through the checkpoint” so you can never be 100% certain that anything will get through even if it seems ok according to the website. Some airports maybe stricter than others and you can’t argue with a security officer. It’s definitely not worth getting kicked from your flight over a pair of scissors! If you can’t do without scissor maybe consider buy a cheap small pair from the dollar store or something else to cut thread with instead.
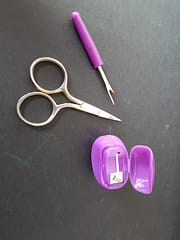
Scissors
Screenshot from TSA website regarding scissors
It says “scissors must be less that 4 inches from the pivot point” but frankly, I would be amazed if someone was able to board with affectively two 4-inch blades bolted together. Even small nail scissors can be a confiscated.
You can also do without scissors entirely - you can use an un-picker or even the cutter from a package of dental floss (you could even organize thread colors into a few of them so you can just pull it out and cut it to length)
Acceptable cutters to fly with
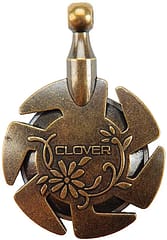
I’ve seen many people on facebook groups suggesting to others to use a clover thread cutter pendant but if you look at the next TSA screenshot below it mentions that cutters containing circular blades are not allowed in carry-on luggage, so I would be very wary of taking one of these on a flight. You may be effectively trying to take something classed as a weapon onto a plane which might not go down too well.
Needles
Needles are allowed according to the TSA website but as always, use common sense - you you really need your entire supply of needles or will just a few suffice?
Screenshot from TSA website regarding needles

Enjoy Your Journey
Don’t feel bad about just taking a break and enjoying your journey, your stitching will always be there when you get home!