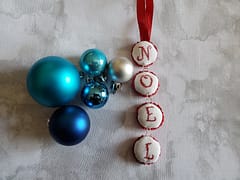
Stitched Cross Stitch Ornament
Padded Finish Decoration
Contents
Introduction
This the second installment in our series on stitched Christmas tree ornaments. This particular post is a tutorial for an ornament finished with padding. As always these are Christmas-themed items but the finishing techniques can applied to any other projects as well.
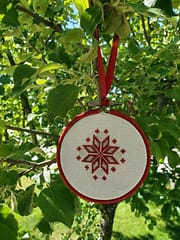
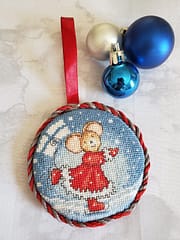
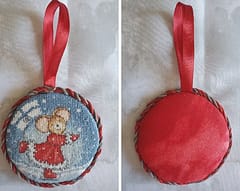
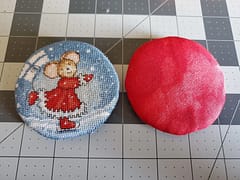
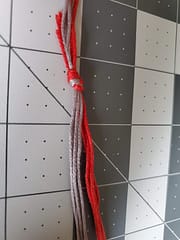
The completed piece that we’re going to make:
Supplies
Here’s what you’re going to need for this project:
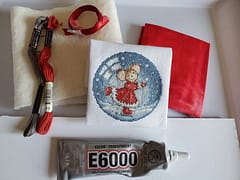
- Stitched design
- Stiff Cardboard (mounting board)
- Glue
- Ribbon
- Backing fabric
- Quilt batting
- Sewing thread
For the Cording
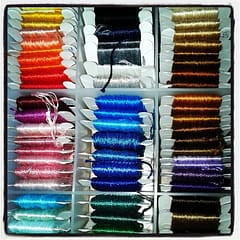
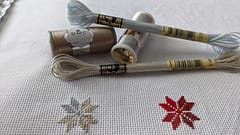
- Embroidery skeins, 2 contrasting colors
- Electric mixer!
- Toothpicks
- Glue
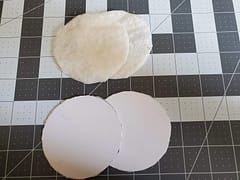
Cut out 2 circles of the cardboard. For this design the inside of a small embroidery hoop turned out to be the perfect size to trace around. Also cut another two circles of the same size from the quilt batting.
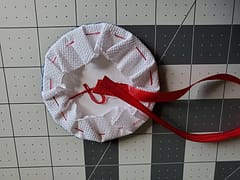
Place a couple of drops of glue on the cardboard and glue a piece of batting to it. Place your padded circle on the backing fabric, padded side down onto the wrong side of the fabric, so when you pick it up you can see the right side of the fabric and it is nice and soft. Then take a piece of floss and do a running stitch around the circle
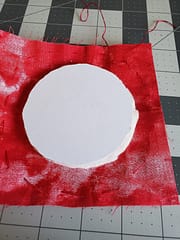
Next pull the two ends of the floss to act like a drawstring to pull the backing fabric taut around the circle. Now tie a few knots to keep it pulled tight, trim the ends of the thread then put a small drop of glue on the back of the cardboard and press the ends of the thread into it to secure them.
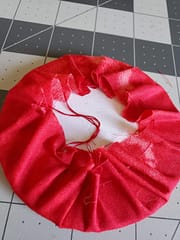
Then repeat this whole process with the other circles and the stitched front piece
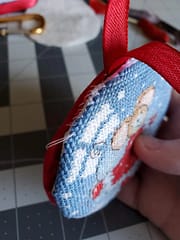
Before joining the two pieces together secure a piece of folded ribbon to the back of the front piece using glue to act as the hanger — be sure that is it placed correctly so that your ornament hangs with the design straight.
Hold the two pieces together and using a sharp needle and cotton begin stitching them together. I used the loop start method to start to avoid a knot and tail. Gradually work around the ornament stitching tightly as you go, make sure you pick up a piece of each side with each stitch.
Cording
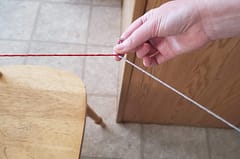
This was the fiddly part! I wanted to make cording without buying a cording drill as I’ll probably wouldn’t use it much again. Basically you just need something that spins to twist the thread tightly so you could use an electric drill or electric whisk to achieve the same affect.
Measure around the outside of the ornament with a piece of embroidery floss, then multiply that length by 4 and cut your thread. Cut another 3 strands of the same length and another 4 lengths of the other colour so you end up with 8 lengths of floss in total, 4 of each colour. Tie the ends of these lengths together
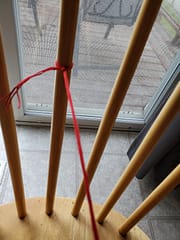
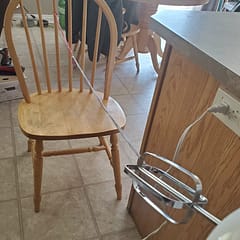
Tie one end to something solid, I used a chair back, and then tie the other end to the electric whisk. It would probably be easier to do this with a hook so you can easily slip the thread off later but I didn’t have one to hand.
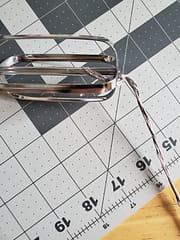
Stand back so that the thread is pulled taut and turn on your whisk, the threads will start to twist and will begin to want to wrap in on themselves if you give the line any slack.
Once the threads are tightly twisted, grab hold of the knot that is in the centre but keep the two ends tight so they don’t wrap themselves up.
Put the two end together, keeping the tension the whole time.
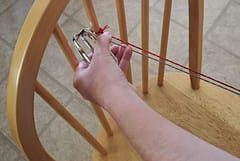
This was where is would have been better to use a hook rather than tie onto the chair as it would have been easier to remove the red thread from the chair !
Hold two loose ends together keeping the tension and then drop the knotted end, it will then twist around on itself, then tie the two loose ends together to secure the rope
You can then give it a bit of a shake and smooth it out with your fingers.
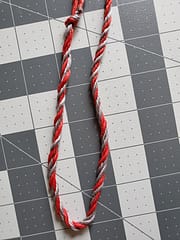
Then you just glue the cord around the edge of your ornament using a toothpick to apply the glue, when you get to the end cut the knot off the cord and add glue to secure the ends and press down.
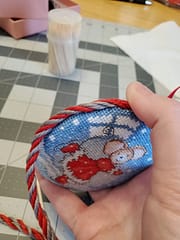
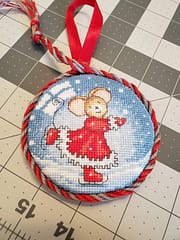
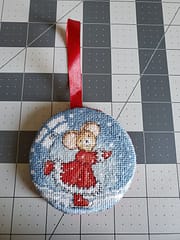
Finished Piece
Here’s the completed piece, I think it came out really well especially as a first attempt.
Another option to attach the cord would be to have the ends meet at the bottom and tie a knot this would leave you with a tassel effect at the bottom
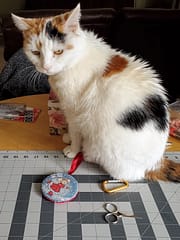
Cat cheeks on your work area are of course always helpful - here’s my project supervisor checking on progress:
The design used for this project is Furry Tales Snowglobe from Lucie Heaton Cross Stitch Designs They have lots of lovely patterns including a whole series of these mice-themed ones.
Be sure to like and follow us on our Thread-Bare Stitching Facebook Page or check out our links page for a full list of all of our social media channels and services Thread-Bare Links