How to Make a Grime Guard
Tutorial on how to make a grime guard for use with your Q-snap
Contents
Introduction
I was always a die-hard hoop stitcher but recently starting using Q-snap’s and am now completely converted! Q-snap covers or “Grime Guards” as many people call them are useful for protecting and keeping your fabric clean while working on a project and also holding the excess fabric on a larger project out of the way. I recently bought one that was Q-snap’s own brand and although it works it was a little too snug and so did not hold the excess fabric easily so I decided to try making my own while I was visiting my mum (and her sewing machine!). They are actually very easy to make as it is only a seam and two long hems.
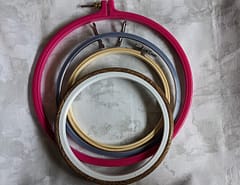
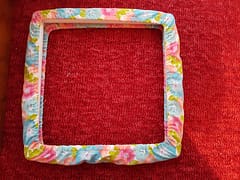
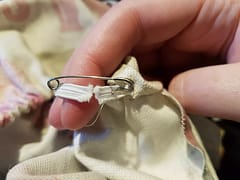
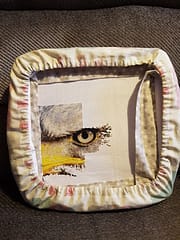
This is the Q-snap brand of cover for an 11 x 11 frame - as you can see it just fits and doesn’t really have any allowance to hold much excess fabric.
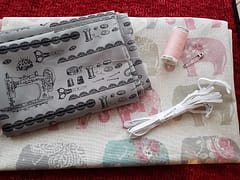
You will need:
- Fabric of your choice
- Elastic - I’m using 1/4 inch
- Scissors
- Tape measure
- Thread
- Sewing machine
- Safety pin
Length of Fabric Required
Add the lengths of the sides of your Q-snap together and then add two inches to allow for the seam where the fabric joins together to form the circle and also the bulk from the fabric. If you regularly work on larger pieces you will have lots of excess material to pack in there so may want to be slightly more generous with the material.
For example I am making a guard for my 11 x 11 Q-snap, so the length needed is 11 x 4 + 2 = 46 inches
Dimensions for Q-snap sizes / combinations (all sizes in inches)
- 8 x 8 frame - 34 inches fabric
- 11 x 11 frame - 46 inches fabric
- 17 x 17 frame - 70 inches fabric (with this length you would likely need to sew two strips of fabric together)
- 8 x 11 frame - 40 inches fabric
- 8 x 17 frame - 52 inches fabric
- 11 x 17 frame - 58 inches fabric
The width required will be the same for all the options above - the width needs to be enough to go around the tube, hold excess fabric and also allow for the hem on either side where the elastic is sewn into the loop. I estimated that the cover that I had previously bought was just over 4 inches so I am going to use 8 inches
For this example I will be making a cover for my 11 x 11 frame, so my fabric dimensions will be 46 inches in length by 8 inches width.
Length of Elastic Required
For the elastic you will need two lengths that are each half the total length of the frame and then add 2 inches to allow for them to be joined together. I’m using 1/4 inch wide elastic but you could use a thicker once but you need to ensure you made your hem wide enough for it to fit.
So for my 11 x 11 frame I would cut two length of elastic that measure 24 inches
Dimensions for Q-snap sizes / combinations (all sizes in inches)
For a rectangular frame you would take the length of two sides and add 2 inches, such as 8 + 11 + 2 = 21 inches
- 8 x 8 frame - 18 inches elastic
- 11 x 11 frame - 24 inches elastic
- 17 x 17 frame - 36 inches elastic
- 8 x 11 frame - 21 inches elastic
- 8 x 17 frame - 27 inches elastic
- 11 x 17 frame - 30 inches elastic
Step 1
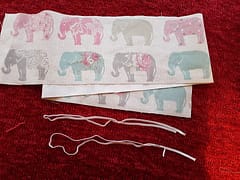
Measure and cut your fabric and elastic strips to the required size
Step 2
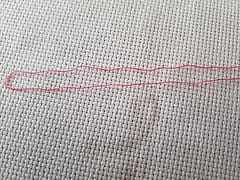
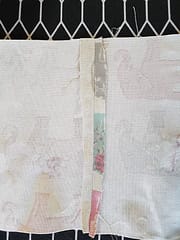
Put the edges together with the print on the inside and sew a seam to join the two ends to form a continuous circle of fabric (about 1.5 cm from the edge)
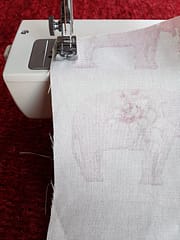
Sewn seam joining the two ends together

Step 3
Iron your center seam flat
Step 4
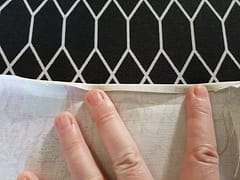
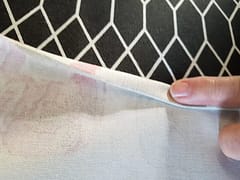
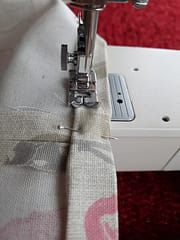
Now you need to create a hem on either side that is wide enough for you to thread the elastic through later. Fold a small hem over followed by a larger one (about 1 cm) and iron these flat. Having the additional fold inside your hem will prevent fraying of the fabric over time as you are using the guard. You can then pin the two hems in place while you sew. NOTE: always place your pins at a 90 degree angle to the direction in which you will be sewing so that they are easy to remove later and also prevents damage to the machine needle.
Small fold - first hem
Larger fold - second hem enclosing the first
Pinned hems ready for sewing
Step 5
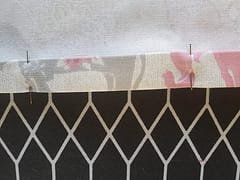
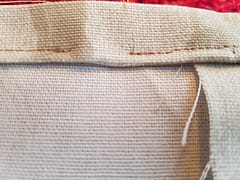
Now you sew close the edge so that you are sewing through the smaller enclosed fold to secure that and also leave enough room to thread your elastic through. Sew around the circle but DO NOT completely close the loop, leave about 2cm gap in your stitches - this is where you will thread the elastic into the guard
Begin sewing you hems in place - note the orientation of the pins to the direction of stitching
Gap in stitches to allow elastic to be fed in
Repeat this on both side so you have two nearly completed hems.
Step 6
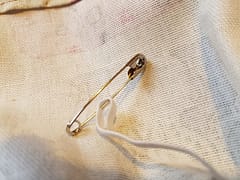
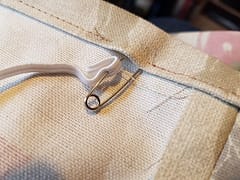
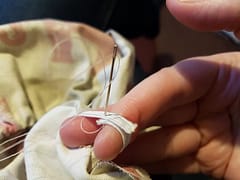
Take one length of your elastic and attach a safety pin to it, then feed the safety pin into the gap in the stitching and push it through the length of your hem, make sure the other end of the elastic doesn’t get pulled through completely.
Step 7
Once you have hold of the two ends of elastic running through the hem - fasten both to the pin so that you don’t lose one and stretch out the cloth to even up the creases, do this on both sides and test attaching it to your Q-snap. If it seems a little loose you can trim the elastic down a bit to make it pull in tighter. Some elastic has more give in it than others so it is better to test the fit before you finish off.
Step 8
Once you are happy with the tension of your elastic on the guard you need to join the two ends together. If you are using wider elastic you could use the machine but as mine was only 1/4 inch I hand sewed the ends securely together
Step 9
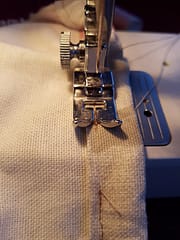
Now go back to the sewing machine and close the gap in the stitching, you need to pull the fabric straight as the elastic is going to cause the guard to bunch up.
Step 10
Trim your threads ends and you’re done !
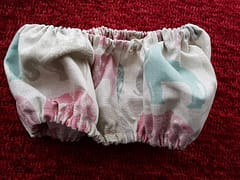
As you can see starting with a wider piece of fabric allows much more room within the guard to contain all the excess fabric while you stitch
I hope you found this interesting and informative. As always, please like and follow us on our Thread-Bare Stitching Facebook Page or Thread-Bare Stitching Pinterest Channel for news and notification of future articles. Also checkout our Thread-Bare Flosstube Channel