Learning to Cross-Stitch
Basics for Beginners
Contents
- Introduction
Introduction
If you are looking for ideas to keep busy during this lockdown period how about starting a new hobby? Here I’ll review the absolute basics of cross-stitching for a beginner, we will cover what materials you need and how to form the basic stitches as well as how to read a typical cross stitching pattern.
What is Cross-Stitching
Cross stitch is a form of counted embroidery. Unlike other forms of embroidery you are mostly just performing one type of stitch to form an X shape - hence the name cross-stitch!
Here’s a simple pattern in a single thread color:
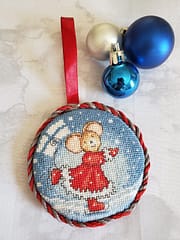
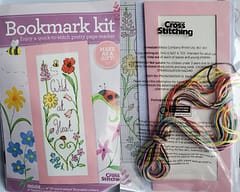
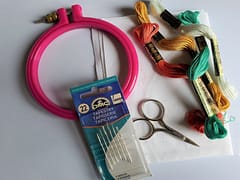
The best way to get a feel for cross stitch would be to buy a cross stitching magazine. A lot of these usually come with a free kit that contains everything you need for a simple 4-5 hour starter project (excluding a hoop, but this is fine you can stitch in hand as these are very small-scale projects). This is probably the most cost effective way to get started and enough for you to decide if you actually enjoy cross-stitching without making a big investment in it. You will also learn various finishing techniques from these type of kits.
Example of free kit from “World of Cross Stitching” magazine
Basic Materials Needed to Get Started
If you would rather just dive in and buy your own supplies, these are the basic materials needed to get started.
- Aida fabric
- Floss
- Hoop
- Tapestry Needle (Round end)
- Scissors
Fabric
When starting cross stitch most people will use Aida fabric. Aida is a cotton fabric made up of groups of threads which are woven together creating an open weave, this open weave forms squares which makes the holes at the intersections easy to see so it is an ideal starter fabric. A good beginner size I would recommend is “14 count”. So, what’s a count?
Thread Count
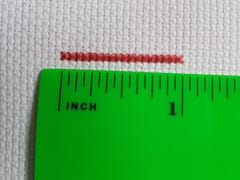
The different types of Aida cloth are labeled according to their thread count. The “count” is how many squares there are over 1 inch of fabric so tells you how many stitches will form over one inch. 14-count fabric has 14 squares (stitches) over 1 inch, and 18 Aida count has 18 stitches over 1 inch. The photo below is an example of 18 count fabric. Note that over 1 inch there are 18 individual stitches.
The thread count also determines the size of the stitches and so controls the size of the design as well. The higher the thread count the smaller each stitch will be.
Although some patterns will tell you they are “designed for a certain fabric count”, this doesn’t really make any sense. You can stitch any pattern on any fabric count you prefer - it will just come out larger and smaller. i.e. if a pattern is 200 x 300 stitches then it will always be 200 x 300 stitches but that would work out to 200 / 14 x 300 / 14 inches on 14 count (14.2” x 21.4”) or 200 / 18 x 300 / 18 inches on 18 count (11.1” x 16.6”).
It’s a little like TVs. A 1080p TV has 1920 x 1080 pixels resolution, but the TV could be a different physical size, such as 32” or 65” … all that changes are the density of the pixels.
So, for a given pattern, you can decide how large the physical piece will turn out by choosing a different fabric count.
Fitting Your Fabric into Your Hoop
You don’t necessarily need a hoop to stitch, you can just stitch in hand, however having tension on your fabric does make it much easier.
Unscrew the nut of the hoop and remove the centre ring.
Place your fabric over the smaller inner ring and lay the larger outer ring on top of the fabric, then push down to reinsert the inner ring into the outer while trapping the fabric in between.
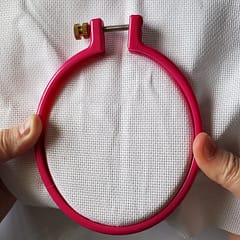
You should then feel the hoops snap into place, then you can tighten up the nut again to create a nice taut stitching area
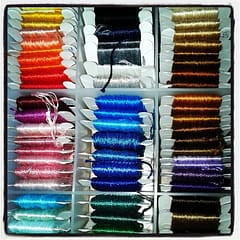
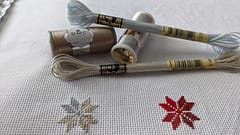
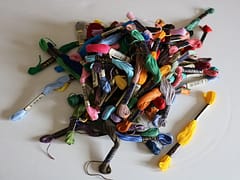
Floss
Cross stitch and embroidery thread is sold in lengths known as “skeins”, each skein is made up of 8 yards of 6 stranded floss. When cross stitching you separate the strands of floss to stitch with. But before you separate your strands you need to cut a length from the skein. Don’t try to separate the entire thing in one go as it will simply become a tangled mess!
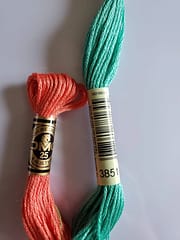
Pulling from the skein without tangling and knotting
Embroidery skeins are pull skeins, meaning you can pull a length of thread out of the skein without it knotting. You need to ensure though that you pull from the correct end otherwise you will end up with a tangled mess! When using DMC branded floss, to pull a length of thread from the skein always pull from the end with the large label that has the number and barcode on.
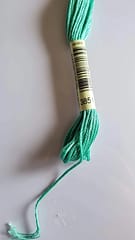
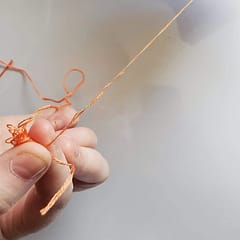
Separate your strands
Cut a length of thread from your skein, I typically use a length of about 18 inches at a time.
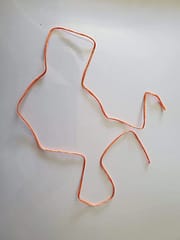
Grip the end of your length and gently tap and brush it, this will allow you to see the individual strands within the thread.

Grip and hold the main length and slowly pull your individual strands from the length one or two at a time, the remaining length will bunch up under your fingers until the threads come free.
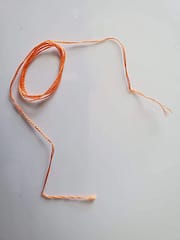
2 Strands ready for stitching
How many strands of floss to use depends on the thread count of the fabric you are stitching with. One of our previous posts shows samples of coverage on various types of fabric. Coverage is how well the fabric is covered - you usually don’t want too much (or any) “white” fabric showing through between the stitches.
The number of strands that might be used is typically fewer, for a higher thread count. That is, if the stitches are smaller, you need fewer strands of thread to achieve good “coverage” compared to a lower count fabric, where the stitches are larger.
Needles
Cross stitching uses tapestry needles which have a rounded blunt tip with a large eye. They come in a range of sizes between sizes 18 - 28 and the larger the number, the smaller the needle.
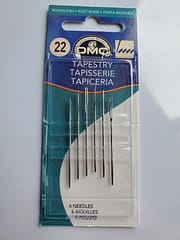
The size of the needle you use depends on the fabric you are stitching on. The larger the holes in the fabric (lower thread count of your fabric), the larger the needle you should use. I typically use 18 count fabric along with a size 26 needle.
Your needle should go through the holes in the fabric easily without stretching them open further. If your needle is too big and stretches the holes then your thread may not fill them and you will have gaps in your stitching.
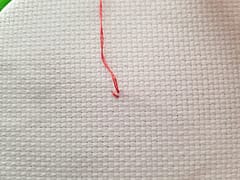
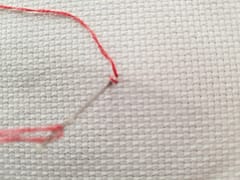
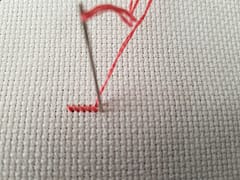
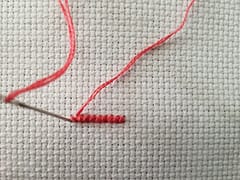
Time to Stitch
Cross stitching forms an X shape using two individual stitches one forming the / arm and one forming the \ arm. It doesn’t matter which direction your arms go in forming your stitches but you should try to ensure that your top arm is always going in the same direction so that your stitches look consistent.
For more detailed step by step instructions on forming your cross stitches check out our previous article on Cross-Stitching Technique. This tutorial also details starting and ending your stitching and anchoring your threads at the back.
General Tips
- When stitching keep your top arm of your stitches always lying in the same direction
- Try to avoid stretching your thread across larger areas in the back. If necessary tie off and start again in the next spot
- Avoid using knots to start and end, you should be anchoring your thread under the surrounding stitches.
- Keep your tension even and consistent, don’t pull your stitches too tight otherwise your fabric will warp, Your stitches should be firm enough to lie flat against the fabric but not be pulling on the holes.
- When stitching your strands of floss will sometimes get twisted around each other - every now and then just drop your needle and let it hang from the threads, this will unwind them
Reading a Cross Stitch Pattern
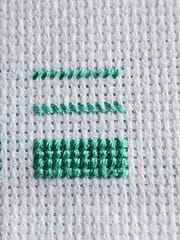
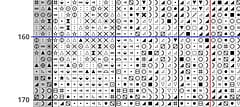
Cross stitch charts usually have a legend showing what color corresponds to which symbol on the chart.
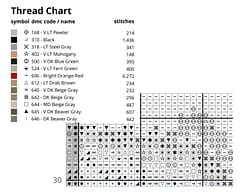
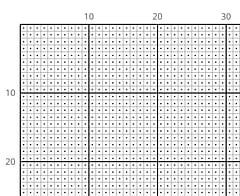
Cross stitch charts are made up of a grid that is divided into squares of 10 x 10. Each square corresponds to one stitch, these numbers are useful for keeping your place on a chart.
A good way to start a project is to find the centre of your pattern and also the centre of your fabric and start stitching from that point outwards.
Most charts will have either lines or arrows showing the centre of the chart. On the example below the centre of the chart is at the point where the two colored lines intersect. Other charts may just have arrows on the edge of the grid which you will need to follow to find the centre point.
These are the very basics of reading a chart, we will cover other types of charts and instructions in a future post.
The main things to remember is that there is no need to spend a lot of money to get started with cross-stitch - it is completely unnecessary. Also avoid jumping into an huge over-complicated project from the start, it will be overwhelming and you will likely be put off continuing, also you will have invested a chunk of money that just goes to waste. Keep it simple and have fun!
Be sure to like and follow us on our Thread-Bare Stitching Facebook Page or check out our links page for a full list of all of our social media channels and services Thread-Bare Links