Tutorial - How to Make a Needle Threader
Make threading needles easier with a custom tool
Contents
Introduction
Time for something a little different. If you do any form of needlework then you’re going to be threading needles … a lot. So it makes sense to use a tool to make it quicker and easier. There are lots of needle threaders available to buy, some very simple and purely practical and others more decorative. As part of the appeal of crafting is making something yourself we thought we’d provide a short tutorial on how to make your very own custom needle threaders …
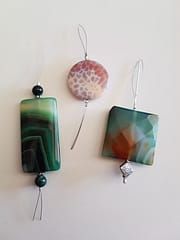
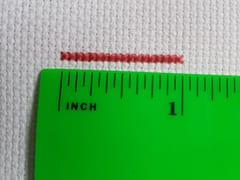
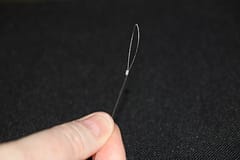
Some needle threaders I’ve made
Supplies Needed
You’re going to need the following:
- Decorative stone or large bead with a hole drilled through the length of it.
- Smaller complementary beads
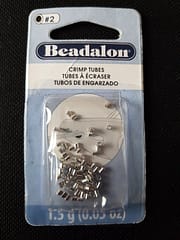
- 2 Crimp tubes
- Bead stringing wire (I’m using 0.30 mm thickness)
- Crimping pliers
- Wire cutters
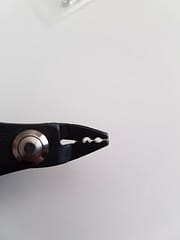
- Flat nose pliers
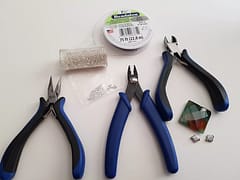
Tools - Flat nose pliers (left), crimping pliers (middle), wire cutters (right)
The wire I am using is 0.30 mm thickness which works with a size 22 needle. If you use a smaller needle you will need to ensure the wire you buy will pass through the eye of the needle when folded in a loop but is also still firm enough to hold the shape of the loop
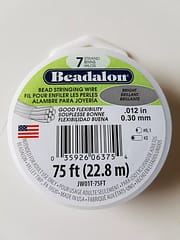
Crimping tubes, size 2 works with this particular size of wire - note on the wire spool pictured above it states what size crimp to use, so if you change your wire thickness, be sure to double-check the crimp size required.
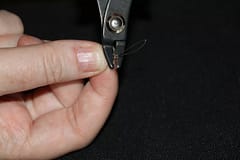
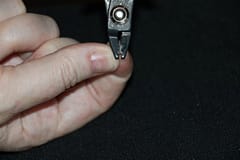
There are two steps to using crimping pliers, first you use the inner semi-circle area to crush the tube in place and trap the wires, then you use the outer area to round the crushed tube.
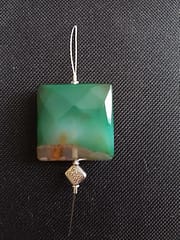
Decorative stone with hole through the length and complementary beads

Instructions
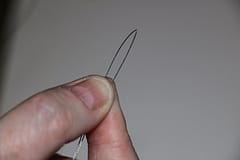
Cut a length of wire about 12 inches long.
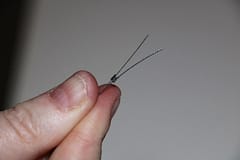
Fold in half and using the flat nose pliers squeeze the loop to crease slightly.
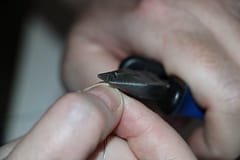
Wire with crease
Put a crimping tube onto both wires and slide it up to the end, leaving a loop of about one inch or just under (this will vary depending on the size of your stone)
Using the crimping pliers crush the tube in place using the semi-circular area of the pliers.
Then use the circular section of the pliers to round the crushed tube.
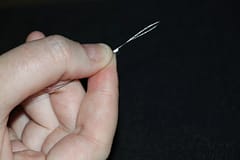
The wire should be firmly held in place now (give the wire a little tug to be sure)
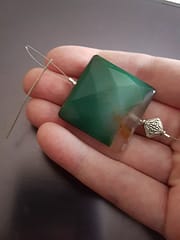
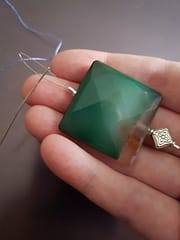
Add your decorative beads and stone, play around with your design and experiment before you secure another crimp at the other end of the design
Trim off the excess wire at the end and you’re done !
How to Use
Thread the loop of the wire through the eye of the needle
Put your floss through loop and pull the threader out of the needle - this should leave your needle threaded !
Now you have a handy tool to use anytime you need to thread your next needle. It’s great using crafts to create tools to help you create other craft pieces!
As always, please like our videos and follow our us on our Thread-Bare Stitching Facebook Page or Thread-Bare Stitching Pinterest Channel for news and future articles.